


Description
IP-Rated Strip-to-Wire Connector: The Professional Solution for Waterproof LED Strips
An IP-Rated Strip-to-Wire Connector is the essential accessory for creating power connections on waterproof or weather-resistant LED strip lights. Standard connectors cannot penetrate the protective silicone coating found on IP54 and IP65 strips, but these specialized connectors are designed to solve that exact problem. An IP-Rated Strip-to-Wire Connector allows you to create a secure, reliable pigtail lead from the end of a cut waterproof strip without any need for soldering, enabling a clean and professional installation even in challenging environments.
Why You Need a Specialized IP-Rated Connector
When working with silicone-coated LED strips, using the correct connector is non-negotiable for a lasting installation.
- Designed for Coated Strips: These connectors are built to create a solid connection with strips that have a top-layer of protective silicone.
- Maintains Weather Resistance: When properly sealed after connection, these connectors help you maintain the weather-resistant properties of your lighting system.
- Prevents Connection Failures: Using the wrong connector on a coated strip can lead to poor contact, flickering, and eventual failure due to moisture intrusion or corrosion. The IP-Rated Strip-to-Wire Connector ensures a solid bite into the copper pads.
- Solder-Free Simplicity: Soldering onto waterproof strips is particularly difficult, as the silicone must be completely removed first. These connectors provide a fast, simple, and effective alternative.
How to Use an IP-Rated Strip-to-Wire Connector
The installation process is simple, but requires one crucial step for waterproof strips.
- Cut the Strip: Make a clean cut along the designated cut line on your IP54/IP65 LED strip.
- CRITICAL – Expose the Contacts: You must carefully remove the silicone coating from the top of the copper contact pads at the end of the strip. You can gently scrape it away with a small flathead screwdriver or a craft knife until the copper is fully exposed and clean.
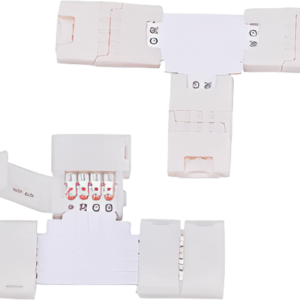
- Open the Connector: Lift the white clasp on the connector.
- Insert the Strip: Slide the exposed end of the LED strip into the connector, ensuring the clean copper pads are aligned under the internal metal pins.
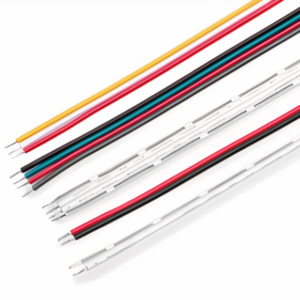
- Align Polarity: Match the polarity markings on the strip (+, G, R, B) to the corresponding wire colors on the connector’s pigtail.
- Secure the Clasp: Snap the clasp firmly shut. It will lock the strip in place, and the pins will make a secure connection with the now-exposed copper pads.
- Seal the Connection: IMPORTANT: The connector itself is not waterproof. To complete the weather-resistant seal, apply a dab of waterproof, neutral-cure silicone sealant over the connection point where the strip enters the connector.
For a detailed explanation of what different IP ratings mean, you can consult this IP Ratings Explained chart.
Applications for IP-Rated Connectors
These connectors are perfect for any project utilizing our waterproof LED strip lights.
- Outdoor Lighting: Create custom-length runs for landscape, patio, and deck lighting.
- Bathroom and Kitchen: Safely install accent lighting in areas prone to steam and splashes, like above showers or as under-cabinet task lighting.
- Marine Applications: Build custom lighting for boats and docks.
- Signage and Commercial Facades: Ensure your outdoor signs and architectural lighting are built to last.
Frequently Asked Questions (FAQs)
Q: Do I really have to remove the silicone? A: Yes. For the vast majority of clamp-style connectors, removing the silicone from the top of the copper pads is essential for the metal pins to make a direct, reliable electrical connection. Skipping this step will result in a poor or failed connection.
Q: What happens if I don’t seal the connection after installing? A: If the connection point is not sealed with silicone or another waterproof method, moisture can get into the connector and onto the exposed copper pads. This will lead to corrosion and will likely cause the connection to fail over time, especially in outdoor or damp environments.


Reviews
There are no reviews yet.