

Description
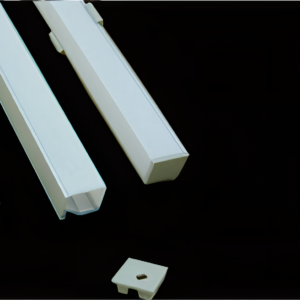
A Recessed LED Profile is the professional’s choice for creating truly integrated, architectural lighting. Unlike surface-mounted channels, this profile is designed to be installed flush within a pre-cut groove in a surface such as drywall, wood paneling, or custom cabinetry. The defining feature of this Recessed LED Profile is its side flanges, or “wings,” which neatly overlap the edges of the cutout, covering any imperfections and creating a flawless, trimless finish. The result is a clean, ultra-modern line of light that appears to be an integral part of the surface itself.
Benefits of a Recessed LED Profile
Choosing a Recessed LED Profile for your project provides a level of sophistication and finish that other mounting methods cannot match.
- Seamless, Built-in Look: This is the primary advantage. The light source becomes a part of the architecture, rather than an addition to it. This is a hallmark of high-end design, often featured in architectural publications like Dezeen.
- Completely Trimless Finish: The flanges ensure a perfect result every time, hiding any rough edges from the router or saw used to create the groove.
- Total Protection: By embedding the channel within the surface, the LED strip is completely protected from physical impact, dust, and debris.
- Superior Diffusion: The channel allows the frosted diffuser to create a perfectly smooth, dotless line of light, ideal for minimalist and modern aesthetics.
Installation Guide for Your Recessed LED Profile
Installing a Recessed LED Profile requires some planning and precision, but results in a stunning finish.
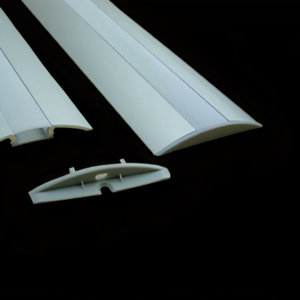
- Create a Groove: First, you must cut a groove or channel into your mounting surface (e.g., drywall, MDF, plywood). The width and depth of the groove should match the main body of the profile (excluding the flanges).
- Mount the Channel: The aluminum channel can be secured within the groove using a construction adhesive or by friction-fit.
- Install the LED Strip: Adhere your chosen LED Strip Light into the base of the channel.
- Connect Wiring: Run your wiring from the strip out through one of the end caps.
- Install the Diffuser and End Caps: Snap the frosted diffuser cover into place along the length of the channel and press the end caps into each end. The flanges of the profile will now be covering the edges of your original cutout.
Frequently Asked Questions (FAQs)
Q: What tools do I need to install this profile? A: You will need a tool capable of cutting a precise groove in your chosen surface, such as a router with a straight bit or a table saw. You will also need a saw with a fine-tooth blade to cut the aluminum profile itself to your desired length.
Q: Can this be installed in an existing wall? A: Yes, it is possible to retrofit a Recessed LED Profile into existing drywall, but it requires careful cutting of the channel. It is often easier to install during the construction phase before the final finishing and painting.
Reviews
There are no reviews yet.